Oracle VM
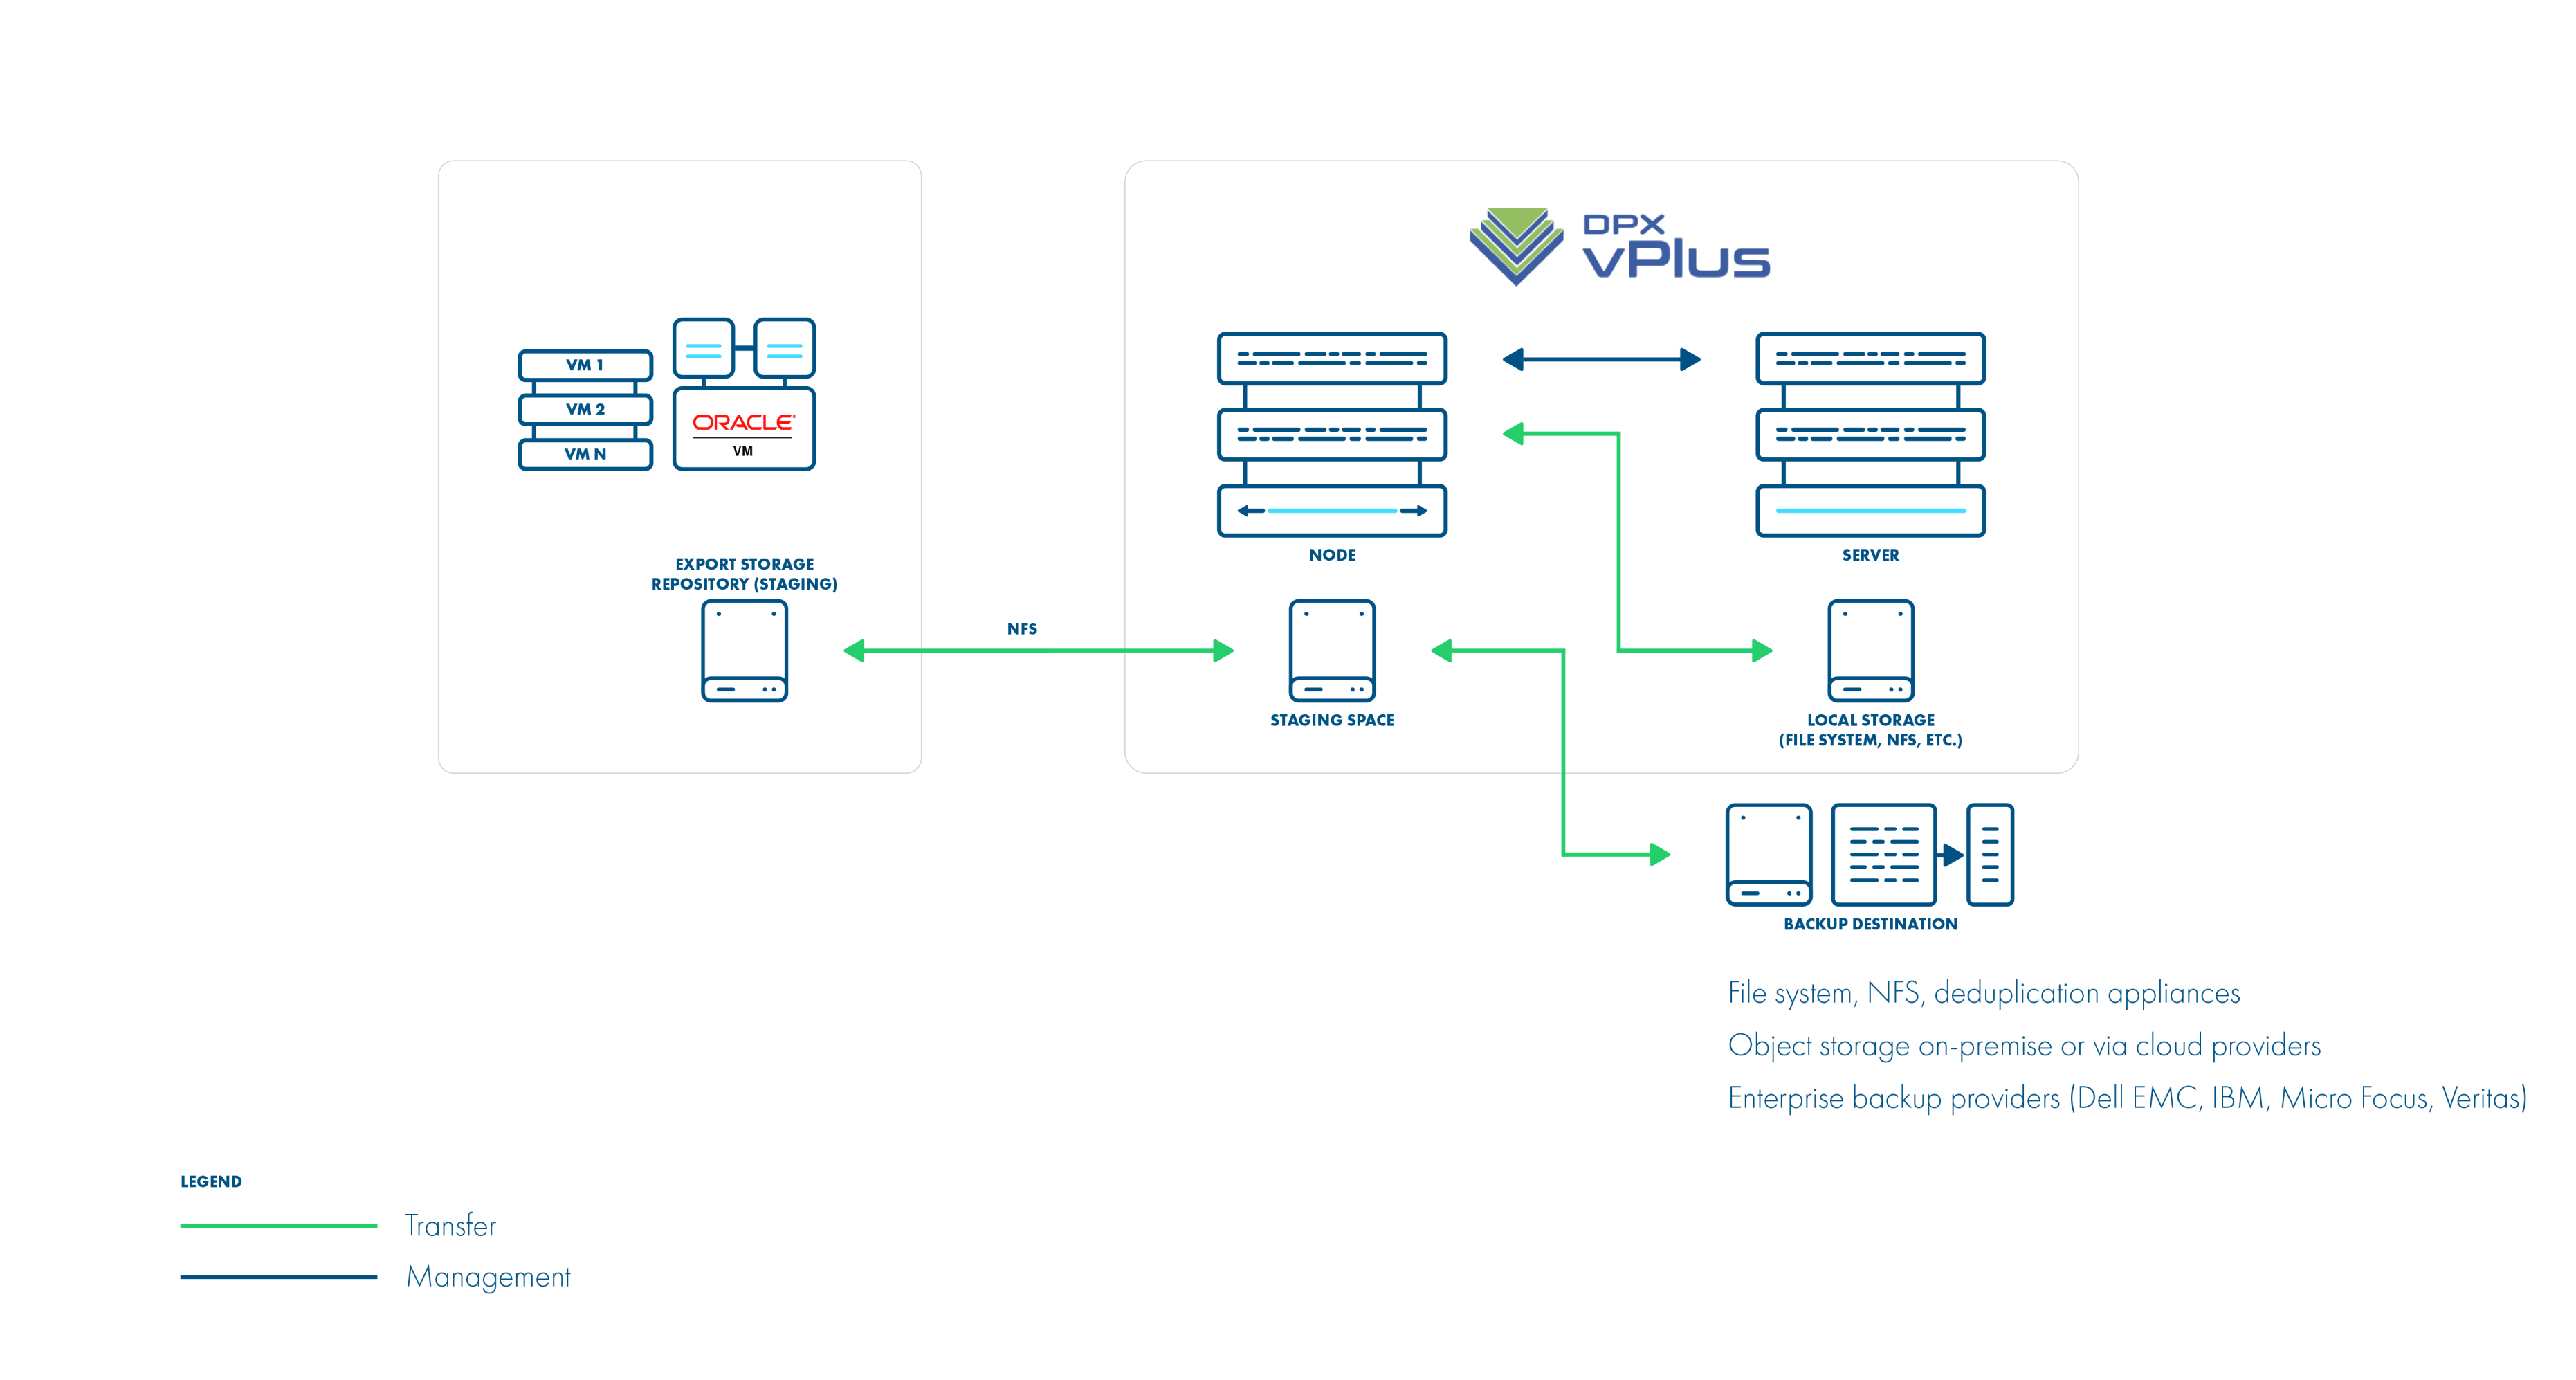
Deployment in Oracle VM environment
The Oracle VM environment requires you to create storage used for VM export. The export storage repository should also be accessible by vPlus Node in its staging directory. This implies that storage space doesn't have to be exported by vPlus Node - it can be mounted from an external source. The only requirement is to have it visible from both OVM hosts and Node itself. Keep in mind that ownership of the files on the share should allow both vPlus and OVM to read and write files.
Backup Process (Deployment in Oracle VM environment)
- crash-consistent snapshot is taken by OVM during hot-clone of the VM
- data + metadata exported by the manager to the vPlus staging space (visible as the export Storage Repository in OVM)
- full backup only is supported
- OVM exports are limited to 1 task per Storage Repository being used by VM (this is the limitation of OVM)
- restore is done to the export Storage Repository, the administrator needs to clone the VM using manager UI
- If the virtual machines are running on NFS storage, you must shut down the Oracle virtual machines to perform the backup
- Make sure the NFS share have the vPlus user UID and GID
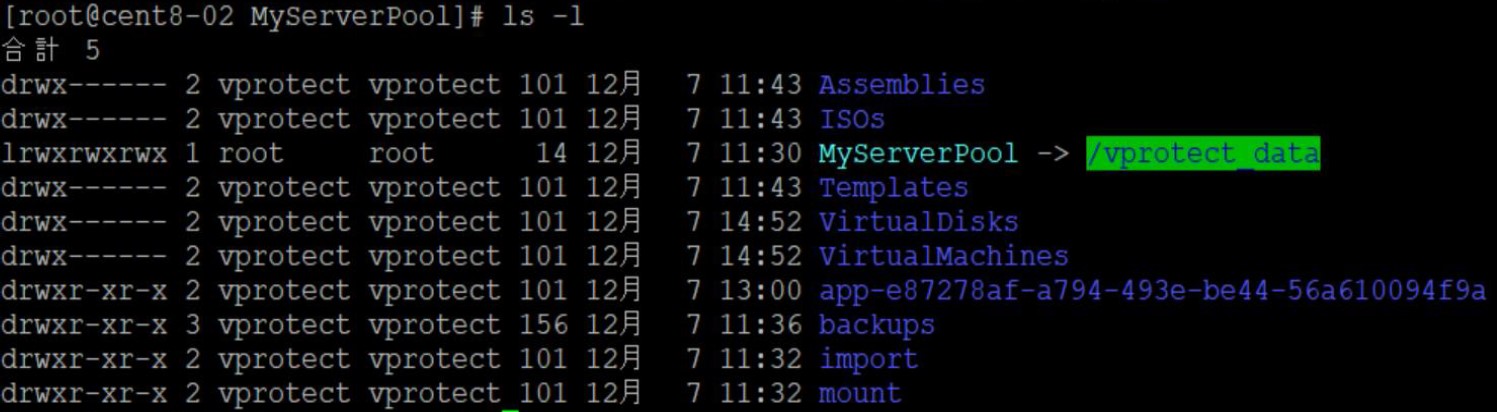
- The directory under / vprotect_data needs to be the same name as the OVS server pool name
- Oracle VM needs to disable services (nfslock , rpcbind**)**
- Restore of VM is multi-step
- Restore to the staging space on vNode
- Move VM from the staging space to the Oracle protection repository
- Migrate the VM into the Oracle server pool
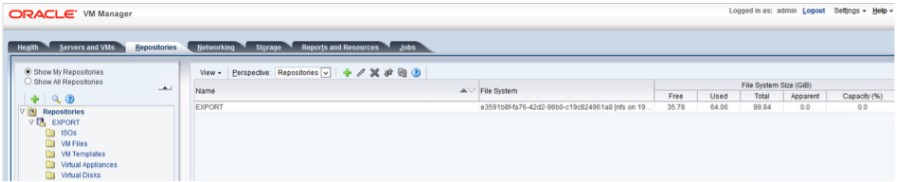
Oracle VM environments require storage repositories to be defined for each server pool and must be mounted on vPlus node.
- Create a repository from NFS share on vPlus node
-
One server pool should have a separate subdirectory in the export path for example
/vprotect_data/pool01,/vprotect_data/pool2- each subdirectory is a separate NFS share -
The export (staging) path in the above-mentioned scenario is still
/vprotect_data, whilepool01andpool02are server pool names -
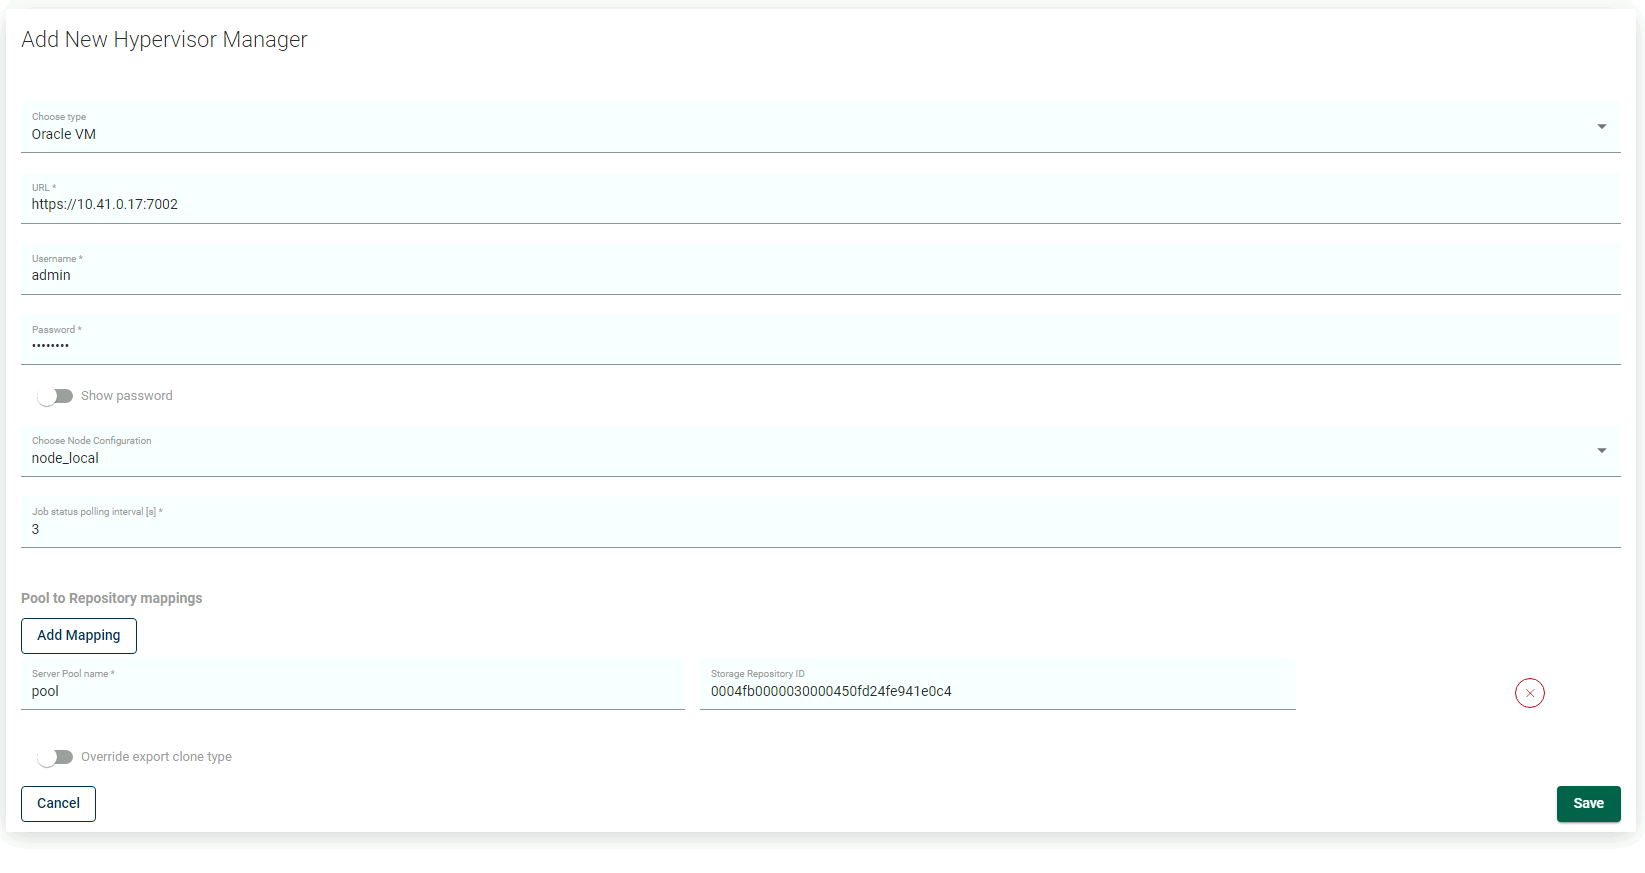
Specify mapping between server pool names and storage repository names in the hypervisor manager configuration
-
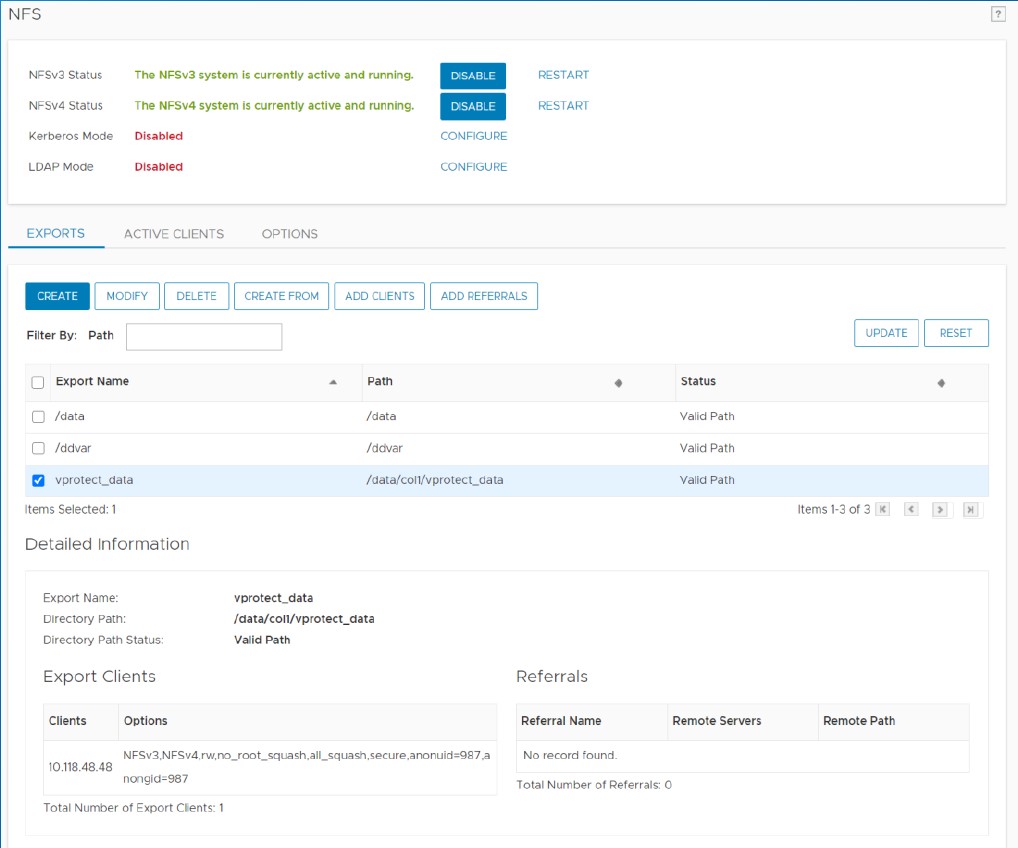
Note that the export must be set to use the UID and GID of the
vprotectuser -
Example export configuration in
/etc/exportsto the selected hypervisor in the RHV cluster:/vprotect_data/pool01 10.50.1.101(fsid=6,rw,sync,insecure,
all_squash,anonuid=993,anongid=990)
/vprotect_data/pool02 10.50.1.102(fsid=7,rw,sync,insecure,
all_squash,anonuid=993,anongid=990)where
anonuid=993andanongid=990should have the correct UID and GID returned by command:[root@vProtect3 ~]# id vprotect
uid=993(vprotect) gid=990(vprotect) groups=990(vprotect)
-
- Both import and export operations will be done using these NFS shares – restore will be done directly to this storage domain, so you can easily import the backup into the Oracle VM environment
- Backups must be restored to the export path (the node automatically changes the names to the original paths that are recognized by the OVM manager).
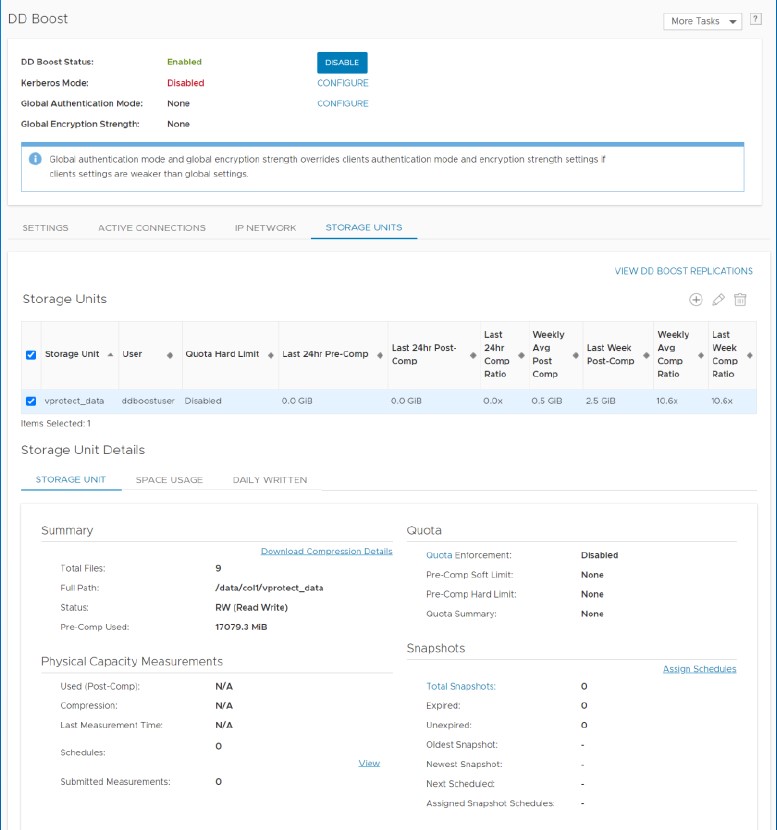
Example - How to configure OVM protection with PowerProtect DD
Create a DDBoost device.
Create NFS share.
Mount the DDBoost device on vPlus Node.
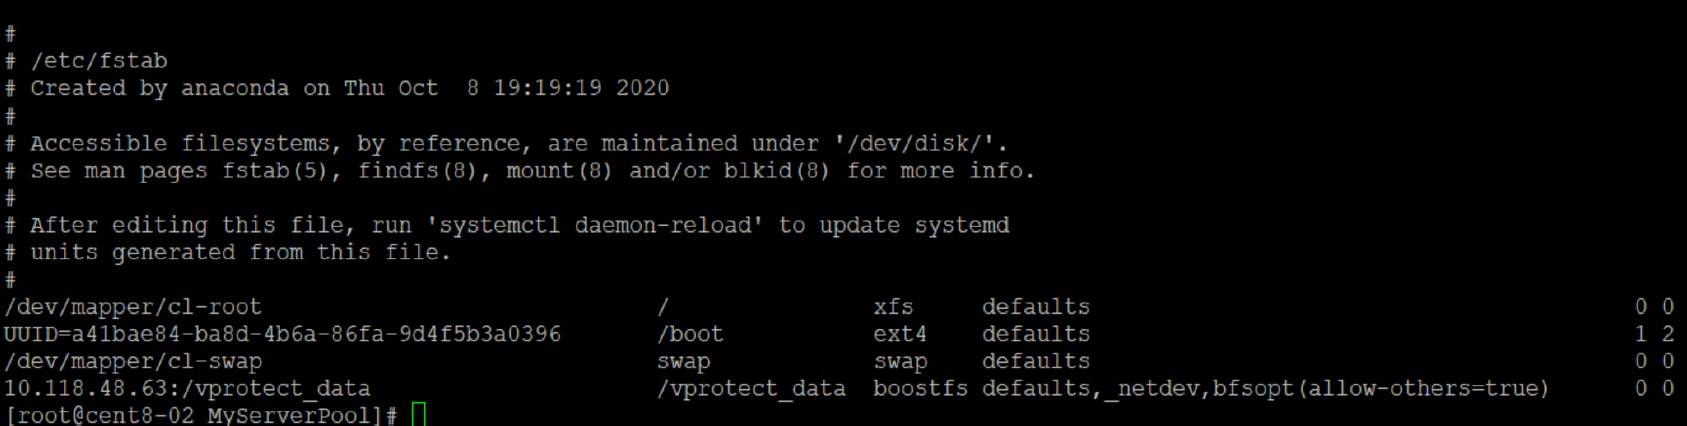
Create symbolic links for the OVM Pool name (MyServerPool) to BoostFS mount point command, for example: ln -s /vprotect_data /MyServerPool
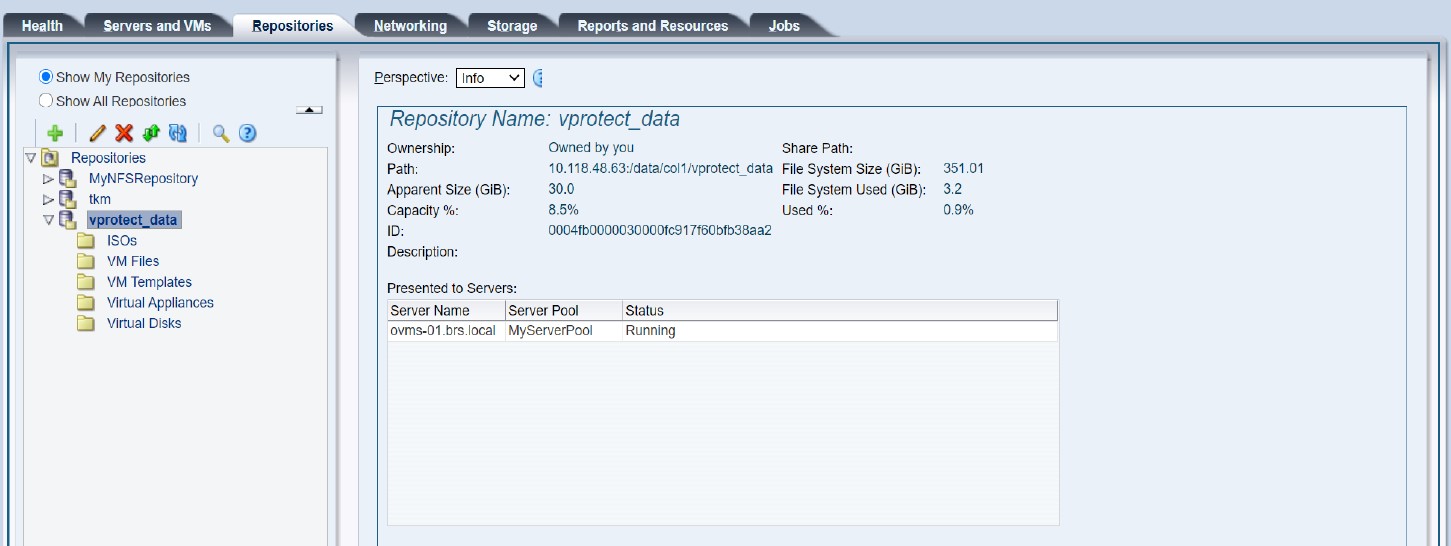
Create a Storage Server for DD NFS Share.

Create a Repository using DD.
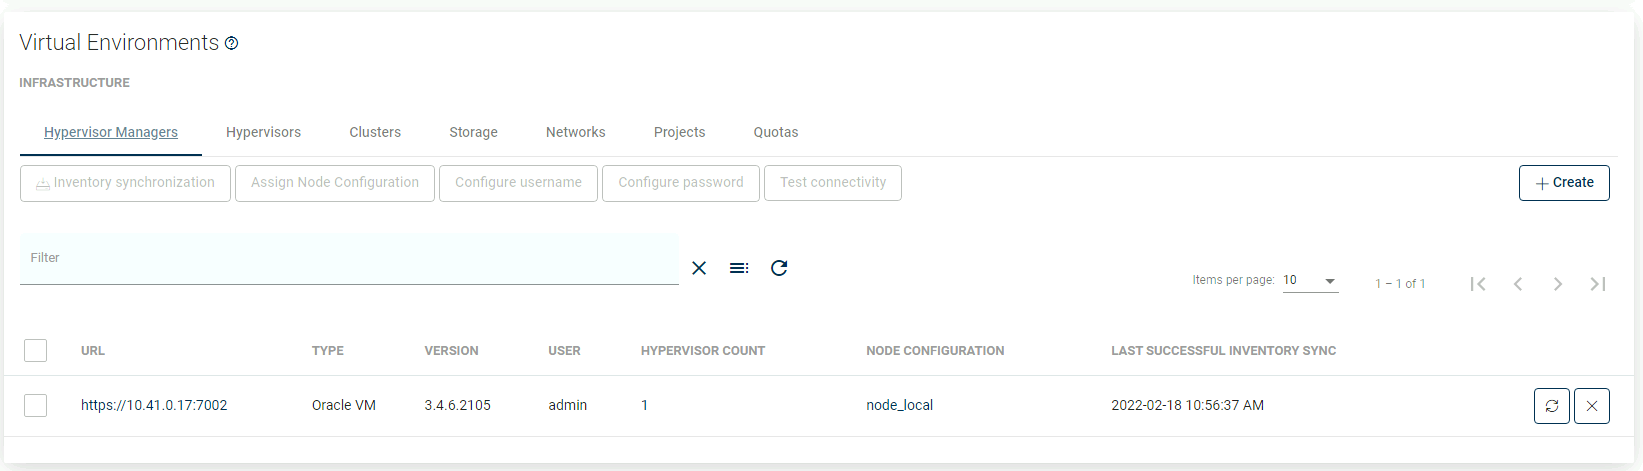
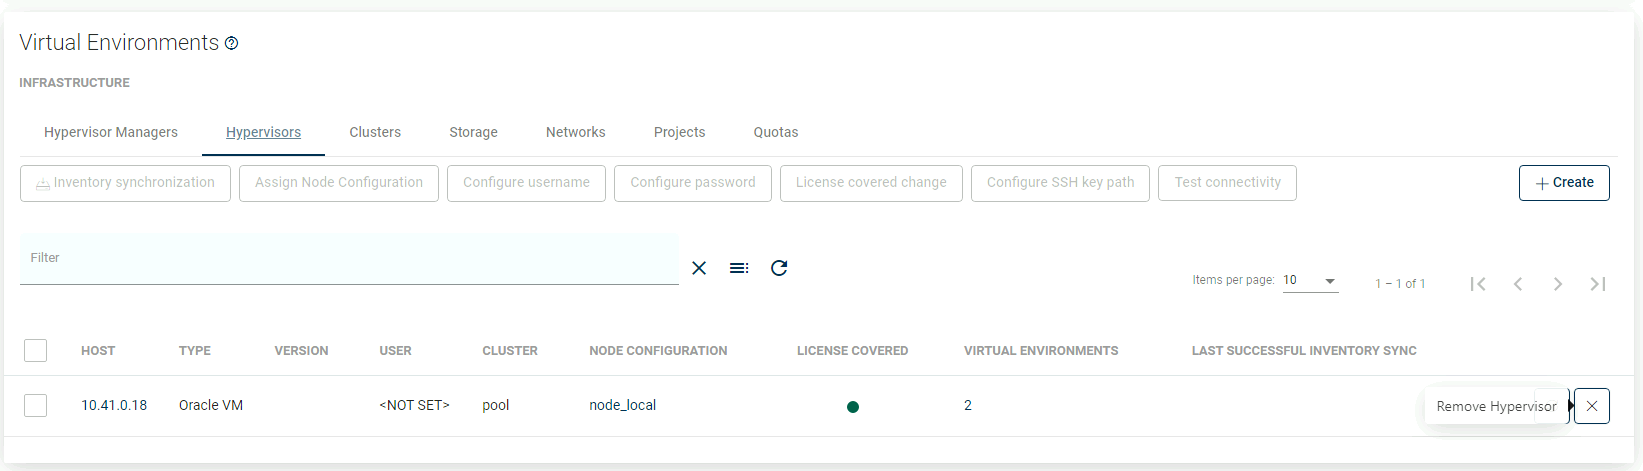
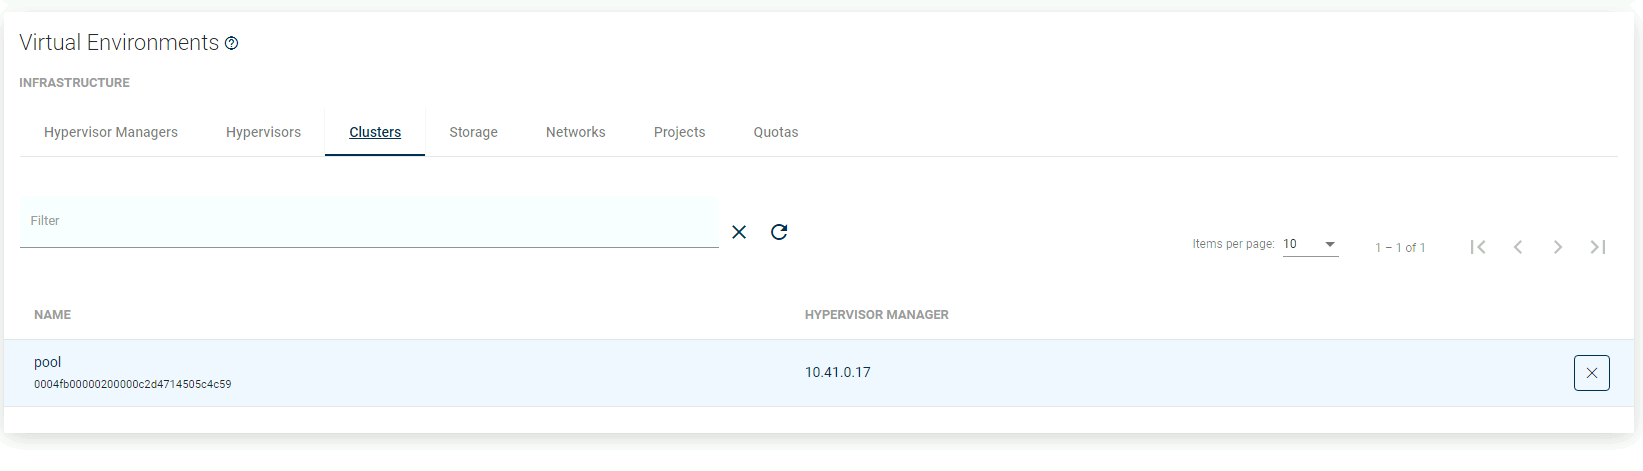
Add the OVM Hypervisor Manager to vPlus.
You can get the "Storage Repository ID"_ _from the "OVM repositories" menu shown in the previous step.
An example of how "OVM" objects should look after resource synchronization.
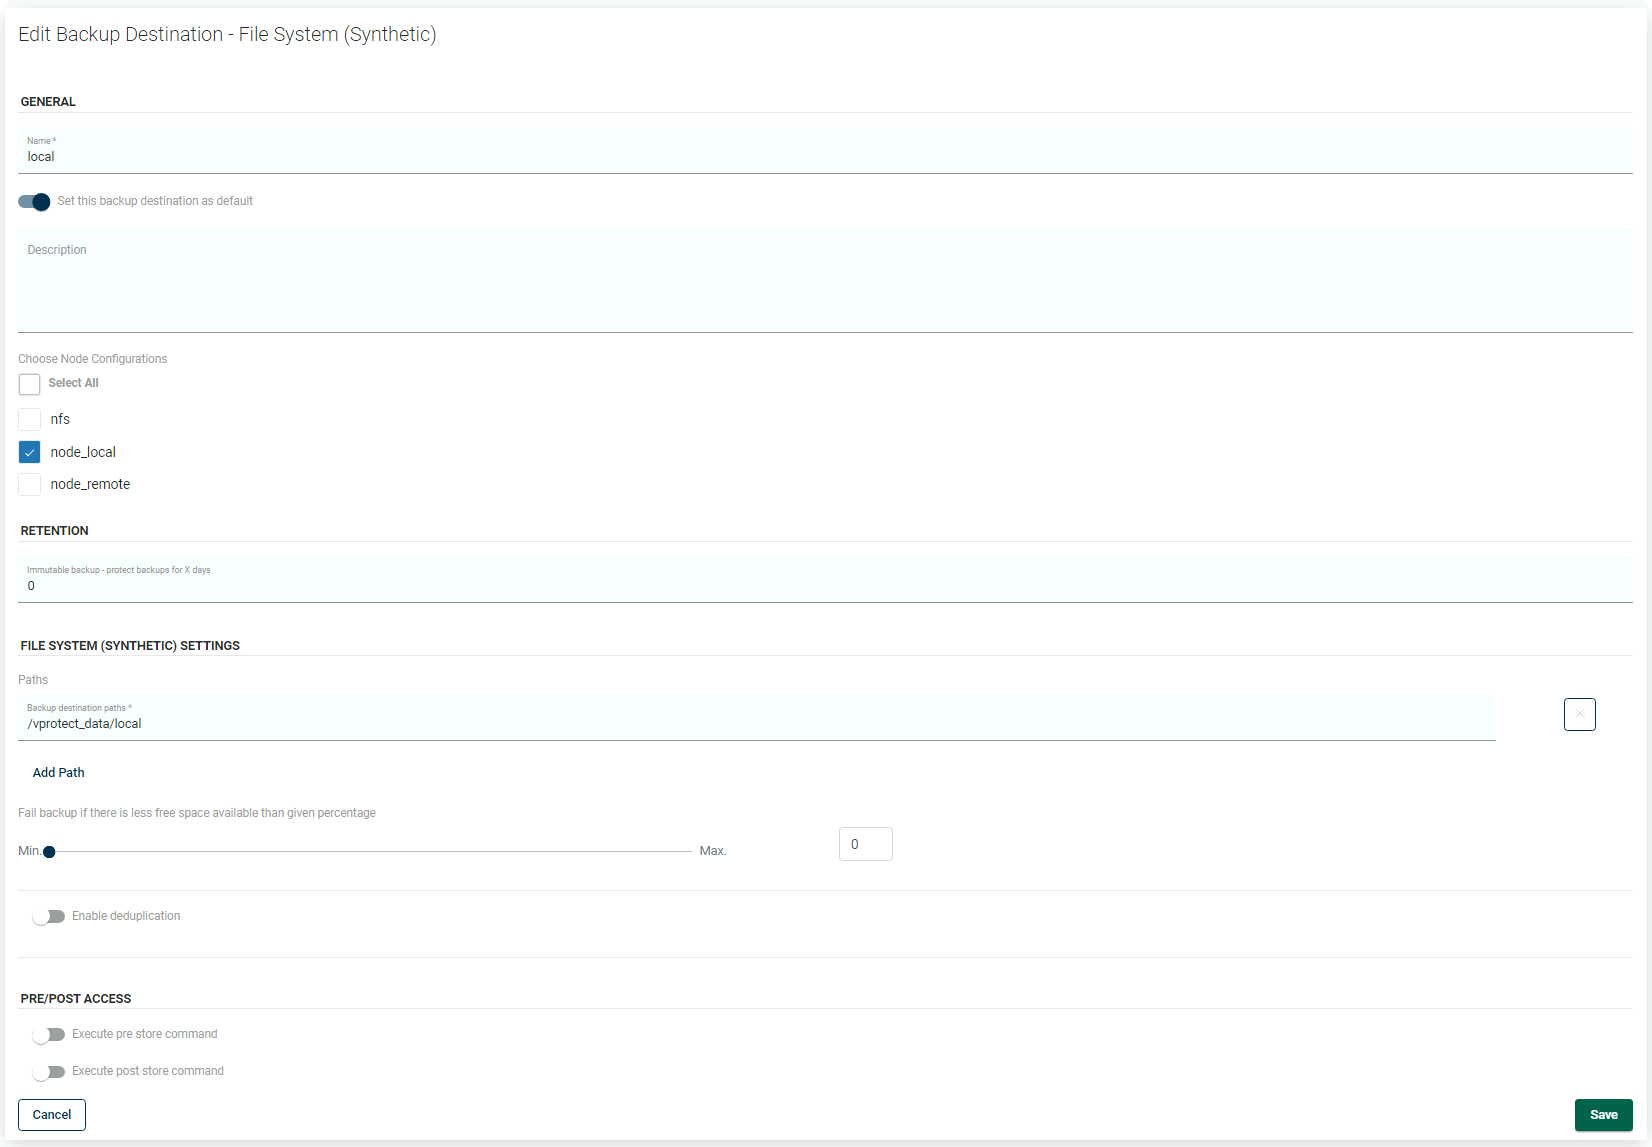
Example of Backup Destination Configuration.
That's it, now you should be able to back up your environment.