isoLayer (Synthetic)
Prerequisites
You need a NFS server with storage with XFS filesystem to properly configure isoLayer Backup Destination in DPX vPlus.
Preparation
-
On NFS server we need to create NFS share, for example:
mkdir /NFS -
Edit file
/etc/exportsto add access to this share:/NFS SBR_NODE_IP(rw,sync,no_all_squash,no_root_squash)Where SBR_NODE_IP is IP of DPX vPlus Node, which will have access to this share
-
Generate new SSH keys, without any password:
ssh-keygen
Generating public/private rsa key pair.
Enter file in which to save the key (/root/.ssh/id_rsa):
Enter passphrase (empty for no passphrase):
Enter same passphrase again:
Your identification has been saved in /root/.ssh/id_rsa.
Your public key has been saved in /root/.ssh/id_rsa.pub.
The key fingerprint is:
SHA256:H2NJwORiG3oJDm78sKEx4EuOzIm13vUsJ6NfMOPVgt0 root@vpro43-vmware
The key's randomart image is:
+---[RSA 3072]----+
|       oo        |
|       ...       |
|. . . + . .      |
|oo o + B + .     |
|ooB o O S E      |
|B*o* o = + o     |
|+*o . o . .      |
| . . .++.        |
|  . oo.=o        |
+----[SHA256]-----+ -
Add new public key to
/root/.ssh/authorized_keysfilecat /root/.ssh/id_rsa.pub > /root/.ssh/authotized_keys -
Copy generated private key (id_rsa) to DPX vPlus Node host
scp /root/.ssh/id_rsa root@SBR_NODE_IP:/opt/vprotect/.ssh/ -
SSH to DPX vPlus Node and change owner of this file:
chown vprotect:vprotect /opt/vprotect/.ssh/id_rsa -
Connect from DPX vPlus Node to NFSs:
ssh -i /opt/vprotect/.ssh/id_rsa root@NFSsaccept new fingerprint and exit from remote session
-
Copy last line from
/root/.ssh/known_hostsfile into/opt/vprotect/.ssh/known_hostsfile -
Configure isoLayer connection. Edit
/opt/vprotect/scripts/isoLayer/configfile:vi /opt/vprotect/scripts/isoLayer/config)
NFS_HOST=NFS4.2_HOST_IP
SSH_USER=root
SSH_KEY=~/.ssh/id_rsa
NFS_HOST_PATTERN=NODE_IP
NFS_ROOT=PATH_FOR_MOUNT_POINTS
NFS_OPTS=rw,sync,insecure,no_root_squash,no_subtree_checkwhere:
NFS_HOST- IP address of NFS serverNFS_HOST_PATTERN- IP address (CIDR) of NFS server, for example: 10.10.0.0/24NFS_ROOT- NFS server share path, where we want to store our backups, for example /NFS/backup
Creating isoLayer backup destination
-
Login into DPX vPlus UI.
-
From menu on the left, select Backup Destinations -> File System.
-
On the right, click Create Backup Destination button and choose isoLayer (Synthetic).
-
In new window:
- type name for the backup destination
- select Node Configurations
- provide backup destination path – this is place, where from DPX vPlus Node perspective, isoLayer will be temporary mount share from NFS server
- Check if pre and post scripts are active, and correct paths are provided like in example:
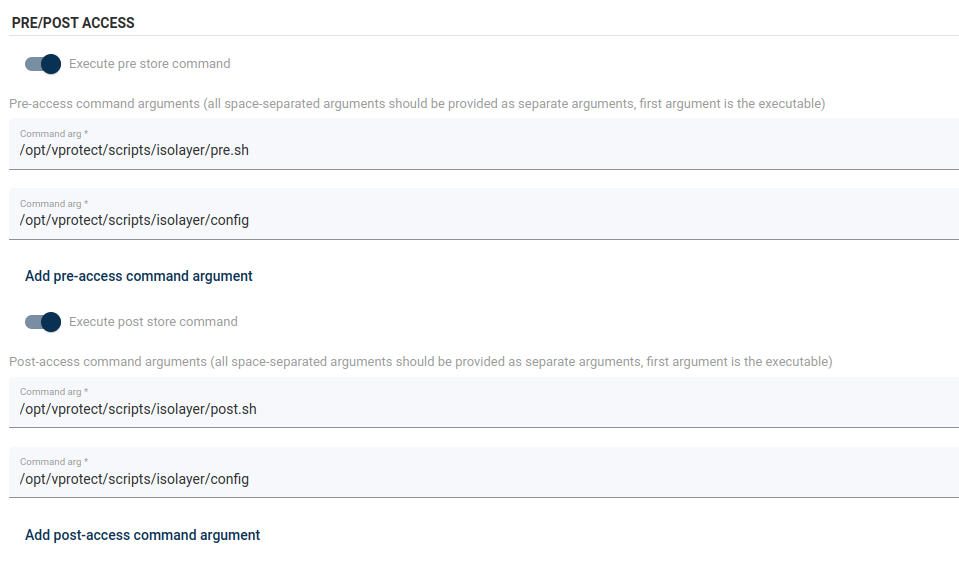
- Click Save button
-
Now you can use this isoLayer connection to store your backup.